
 Free Screen Recorder for Chrome


What is a CNAME?
A CNAME record is a DNS record that can be used to make another webpage appear under your own domain name. With StoryXpress, you can set up a Custom Domain for your videos to have your already customized video page appear under your own domain name!
How to set up your CNAME?
- Setting up your custom domain name has 3 steps –
- Add your subdomain to our Dashboard
- Add a CNAME record with your DNS Provider
- Enable hosting on the videos you want to share on your custom domain
We will be using myownvideos.mydomain.com as an example throughout this guide.
Adding your domain to our Dashboard
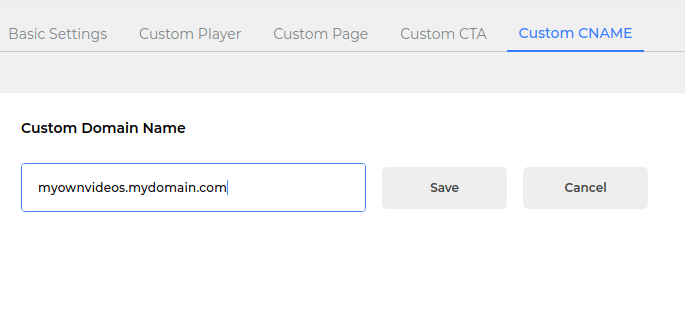
Head over to storyxpress.co and log in to your dashboard. Under Default Settings on the left, head to the Custom CNAME tab. Here, click on Add and type in your domain name along with the subdomain (the part before the first dot!)
In our case, we type in myownvideos.mydomain.com, and hit save.
Adding a CNAME Record
Now, head to your DNS Provider – this is where you purchased your Domain Name (mydomain.com) from. Once you’re logged in, head to the DNS Management section of mydomain.com, and add a New Record. Set the type of record to CNAME, and set the host to myownvideos and point it to videos.storyxpress.co.
This is what it would look like on GoDaddy –
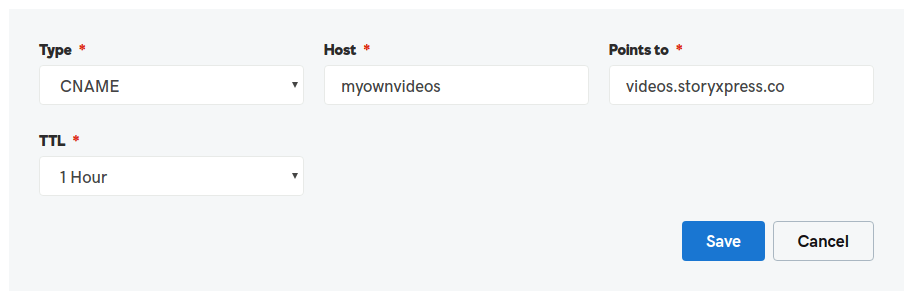
Hit save, and we’re almost done.
Note: DNS changes take up to a few hours to propagate across the world.
And Hurray!
Now you just need to copy the link of your StoryXpress video and it’s ready to be shared 😀
To Set up a Cloudflare CNAME –
We use self-generated SSL certificates to serve your CNAME pages. This certificate is generated on our end and will not match the SSL certificates used to serve the rest of your website.
To fix this, kindly switch the SSL Options in the Cloudflare dashboard from Strict to Flexible.
https://support.cloudflare.com/hc/en-us/articles/200170416-End-to-end-HTTPS-with-Cloudflare-Part-3-SSL-options#h_4e0d1a7c-eb71-4204-9e22-9d3ef9ef7fef