The custom background feature allows you to set up a background for Face-only mode and when you expand your camera in screen+cam mode. This helps the viewers to connect with your brand’s voice and increases engagement.
Follow below easy steps to set your custom background:
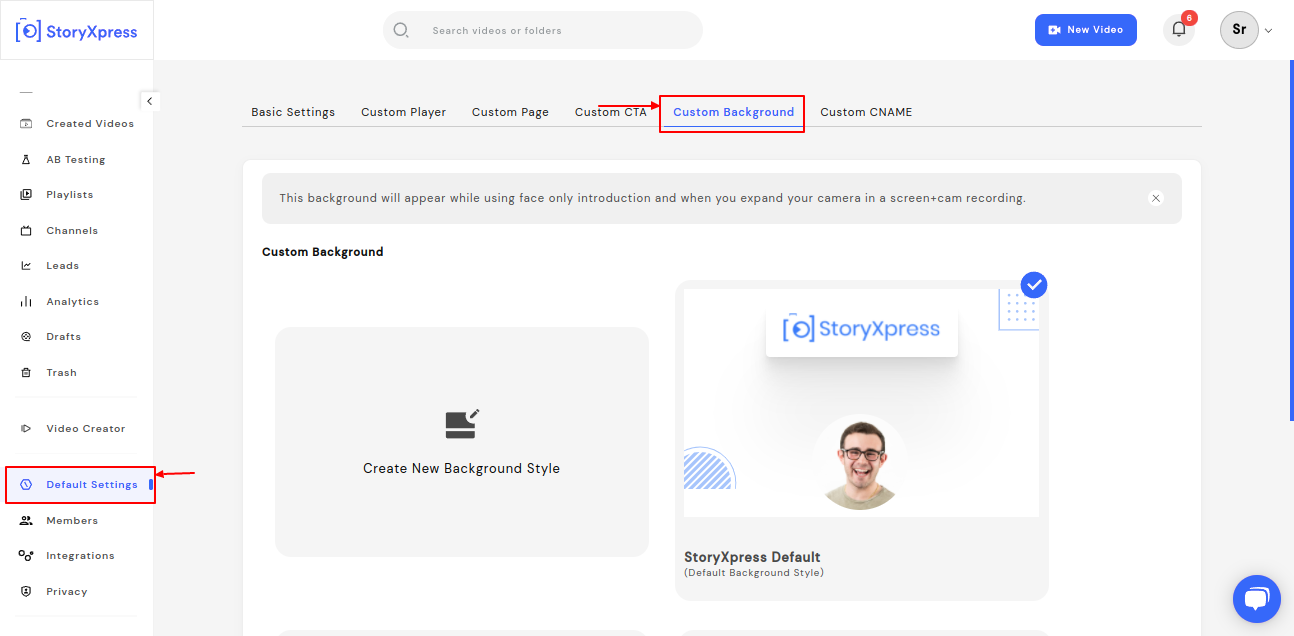
Step 1: Go to the StoryXpress dashboard.
Step 2: Select the Default settings from the dashboard.
Step 3: Access the‘ Custom Background’ option.

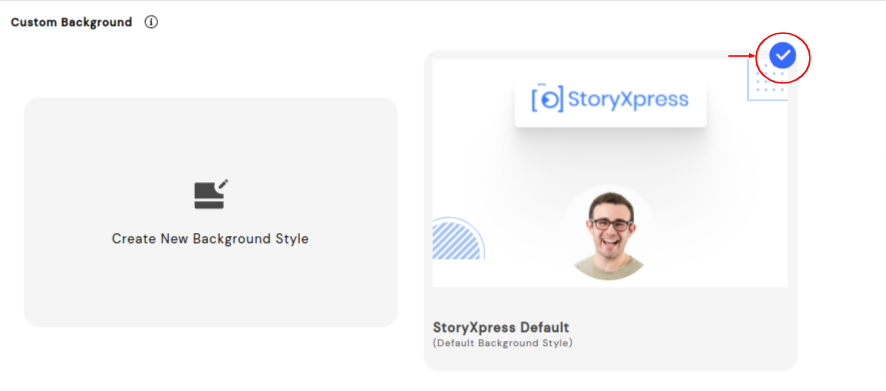
To create and save a new style, select ‘ Create new background style’ (as shown in the picture).

Once done, it will lead you to various options to customize your background.

Enter custom name: Save your design by a name for future reference.
Colour: Change the color of the background from here.
Upload your background: Upload a picture for your background from your local device
Custom logo: Toggle on to show your customized logo.
Upload custom logo: Upload your customized logo from here.
Once you are all set, hit ‘create style’ to save it and set the style as default so that it is visible while you are creating the video.
Note: The tick mark on the top right corner of the style is the active style in use.


 Free Screen Recorder for Chrome


